Wire rope clips are essential components in rigging and lifting operations, but their effectiveness depends entirely on correct installation. Misapplied clips can reduce the holding power of a wire rope by as much as 20% to 60%, creating significant safety hazards.
The following guide breaks down the industry-standard process for creating a secure eye loop using U-bolt wire rope clips.
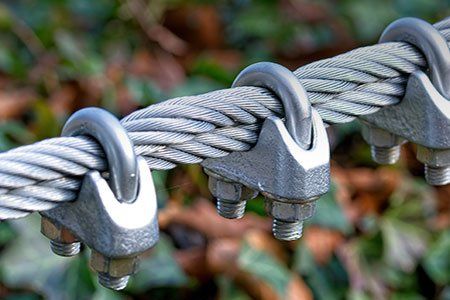
Anatomy of a Wire Rope Clip
Before beginning, it is vital to identify the three primary components of the clip:
- U-Bolt: The curved bolt that loops over the rope.
- Saddle: The grooved base that cradles the rope.
- Nuts: The fasteners that secure the U-bolt to the saddle.
It is also important to distinguish between the two parts of your rope:
- Live End: The long part of the rope that carries the actual load.
- Dead End: The short, cut end of the rope (the “turn back”).
Common Installation Mistakes to Avoid
To ensure the integrity of your connection, avoid these two frequent errors:
- Reversed Saddles: Never place the clip saddles on the dead end of the wire rope. This crushes the load-bearing side of the rope and significantly reduces its strength.
- Staggered Clips: Clips should never be installed in alternating directions. All U-bolts must be on the dead end, and all saddles must be on the live end.
Post-Installation Safety
After the rope has been put into service, it is standard practice to re-tighten the nuts. Wire rope tends to compress under tension, which can loosen the grip of the clips. Regular inspections should be conducted to check for rope slippage or nut loosening.